by Angela Braun | Jul 5, 2024 | Bodycare
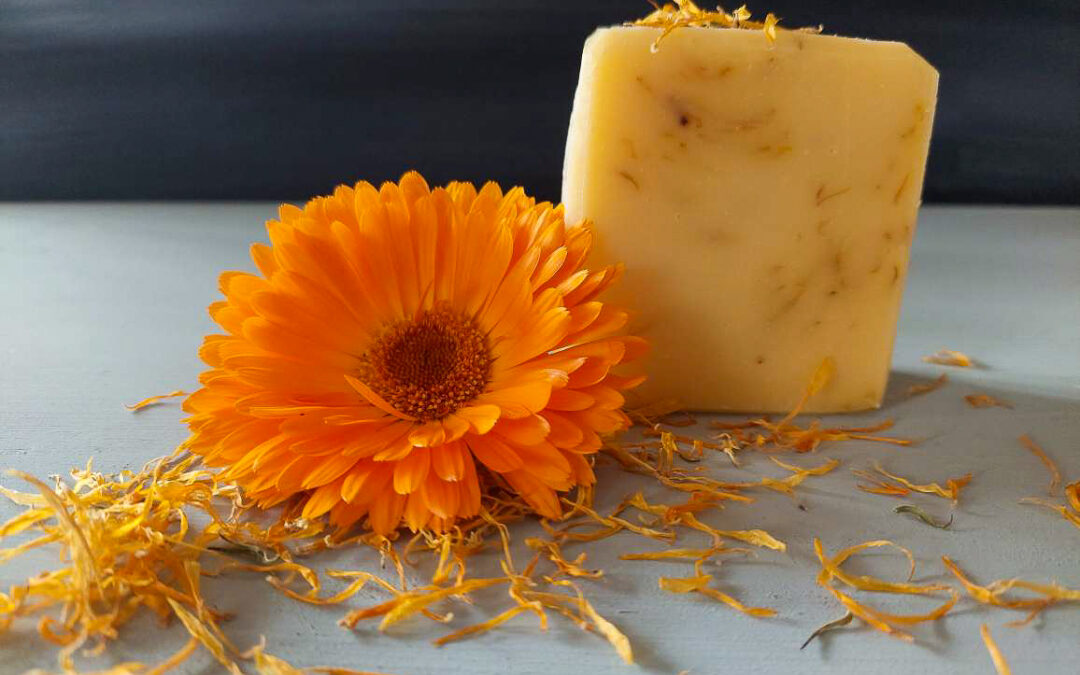
Calendula is known for its skin-soothing and wound-healing effects. This easy recipe for calendula soap makes for a very mild soap that’s even suitable for babies. The recipe is beginner-friendly which means that the process is not too complex. If this is your first soap, however, you should familiarise yourself with the soapmaking process and carefully observe the safety guidelines.
This soap can be used for the body and face. It’s especially suitable for sensitive skin due to the soothing effect of calendula. We use homemade calendula oil, calendula tea as a basis for the lye solution and dried calendula petals. As calendula is also a great colouring agent, we won’t need any clay or additional soap colours. The oil and tea will make for a beautiful yellow tint. (For more uses for calendula look here).
If you plan to use this soap for babies, do not use essential oil.
Calendula Soap
Superfat: 7 %
Ingredients
700 g calendula oil
200 g coconut oil
100 g sunflower oil
133 g sodium hydroxide (NaOH)
330 g water
5 tbsp dried calendula petals
20 g essential geranium oil (optional)
Instructions
1. Prepare your soap mould and put on an apron, gloves, breathing mask and safety goggles.
2. To prepare the calendula tea, put 3 tbsp of dried calendula petals into a jar. Weigh 350 g of water and put it to the boil. Pour the boiling water over the petals and let this tea rest for 30 minutes. Drain the tea and let it cool.
3. Weigh the oils. Slowly melt the coconut oil, then add the sunflower and calendula oil. Put a thermometer into the oil mixture and measure the temperature.
4. Weigh the calendula tea in a large enough, heat-proof container.
5. If you use essential oil, weigh it and put it aside for later use.
6. Weigh the sodium hydroxide. Put the water container into a sink and slowly pour the sodium hydroxide into the water (never the reverse!). Stir carefully and slowly with a spoon until the NaOH crystals have dissolved. Put a thermometer into the lye water and measure the temperature.
7. When the temperature of the lye-water and the oils has fallen to 40 – 45 °C, carefully pour the lye into the oils (never the reverse!). Fully immerse the blender and start mixing both liquids until they are well combined. Make sure that the blender stays in the batter to prevent air bubbles. Mix the batter until a trace forms.
8. If you use essential oil, add it to the soap batter and mix it well.
9. Add the dried calendula petals and mix them in with a hand whisk.
10. Pour the soap batter into the mould and either cover it with cling film or spray it with isopropyl alcohol. Cover the mould with towels to keep it warm. Leave the soap in the mould for 48 hours.
11. After 48 hours, carefully remove the soap from the mould and cut it into bars.
12. Let the soap bars cure at a cool and well-ventilated place for 4 – 6 weeks before use.
You like this soap? Then you may also like this recipe for green mint soap. Or try out this one for orange peeling soap.
by Angela Braun | Jul 5, 2024 | Bodycare, Preserving
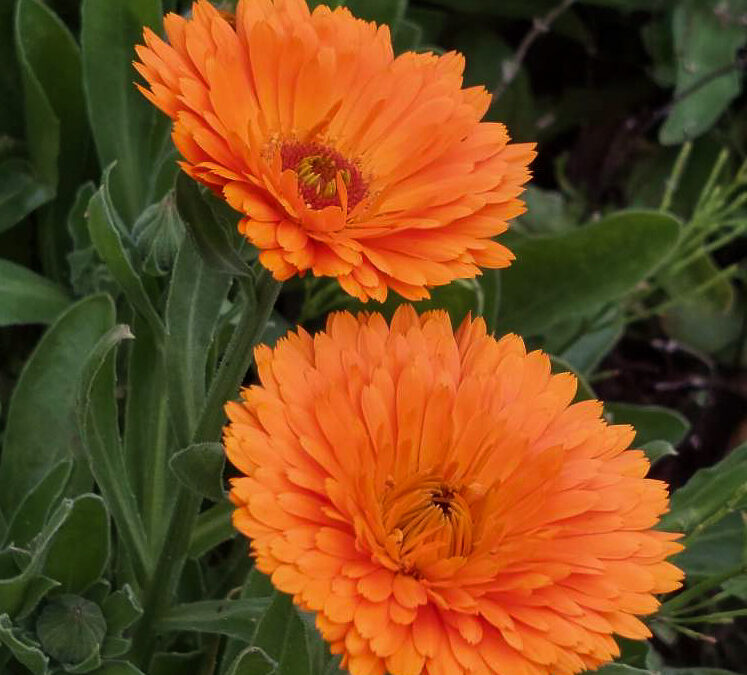
The first year I cultivated my garden, I decided to sow a few calendula between rows of red cabbage. The patch looked beautiful with its combination of thick violet cabbage heads and the bright orange calendula flowers floating above them like tiny suns. Not knowing how to use the flowers, I just let them wither and harvested only the cabbage. I don’t know what I had decided to plant on that patch the following year. What I do know, however, is that the only thing that grew there was calendula. They spread like the proverbial wildfire and it was time to get them under control (failed!) and learn how to use them (check!). This post shows you my five favourite uses for calendula.
Ingredients and benefits of calendula
Calendula is often used against skin problems like small wounds, burns, cracks, bruises and inflammation. Folk medicine also uses it for stomach and bowel disorders, emotional stress and injuries. Calendula contains flavonoids, triterpenes and saponines. Fat-soluble faradioles are mainly responsible for the wound-healing effects.
Among others, calendula shows antibacterial, decongestant, anti-inflammatory and anti-fungal as well as antispasmodic effects. Furthermore, it supports the formation of new connective tissue.
With its brightly warm and sunny orange nature, calendula heals not only physical wounds but is also said to have a soothing effect on an emotional level.
All recommendations in this post are based on my experience. I’m not a doctor and thus cannot be held liable for any adverse effects in connection with the use of the following recipes.
Five uses for calendula
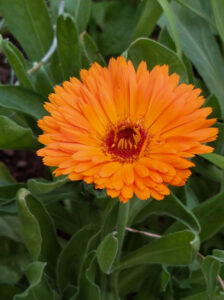
#1 Calendula oil
This is a classic and so easily made. All you need is
1 glass jar with lid
Calendula flowers (fresh or dry)
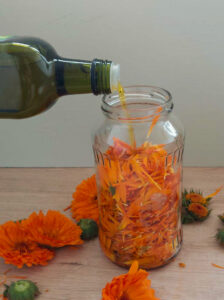
Olive oil
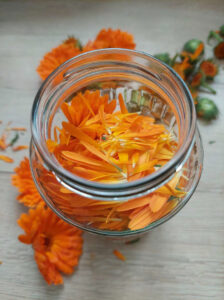
Pluck the petals from the calendula flowers and fill them loosely into the glass jar until it’s roughly full. Fill the jar up with the olive oil and close the lid. Put the jar onto a windowsill and let it rest for 10 – 14 days. Shake it every day.
After that time, strain the oil through a sieve into a second jar. Press the petals out thoroughly to remove every drop of oil. Close the jar and store the oil in a cool, dark and dry place for up to one year.
If you’re pressed for time, you can make a warm extraction. For that purpose, put the calendula petals and the oil in a jar and place that you place in a hot water bath. Let it simmer for about 30 minutes at no more than 60 °C while occasionally stirring. Let it cool and repeat the process. Then filter the mixture through a sieve and let it cool down.
Application
Calendula oil can be used as an alternative to calendula salve (see below) to support wound healing. It’s great for small injuries, inflamed skin, mastitis or nailbed infections. You can make compresses with gauze presses soaked with calendula oil. However, you should never apply it on deep or open wounds. Calendula oil is also an ingredient for calendula salve and calendula soap.
#2 Calendula salve
As I said before, calendula is THE herb for the skin. It soothes your skin and heals small wounds and irritations. Number 2 of my favourite uses for calendula is calendula salve. You’ll only need
250 ml calendula oil
25 g beeswax
Slightly warm the oil in a pot. Add the beeswax and let it melt until all is liquid. Make sure that the oil temperature won’t rise above 60 °C. Fill the mixture into small jars, close the lid tightly and let it cool. Store at a cool and dry place for up to one year.
Application
Use calendula salve as a soothing hand cream for working hands or to support the healing of irritations or small wounds. If you work in the garden and are a bit like me, you’ll always have scratches, skin irritations (hello stinging nettles) and overall rough hands. This is when calendula salve can do wonders for your skin. It soothes immediately and minor injuries seem to heal almost overnight!
#3 Calendula tincture
A tincture is a herbal extract in alcohol. For this calendula tincture, we need:
1 glass jar with lid
Calendula flowers (fresh or dried)
Alcohol (45 %)
Pluck the petals from the calendula flowers and fill them loosely into the glass jar until it’s roughly full. Fill the jar with alcohol (45 %) and close the lid. Put the jar in a warm place at room temperature but without direct sunlight and let it rest for 7 days. Shake it every day.
Strain the tincture through a sieve and press the petals out thoroughly. Fill the tincture into dark jars (e.g. amber glasses) and store at a cool, dark and dry place for up to one year.
Application
Like calendula oil and salve, you can use calendula tincture to support wound healing or prevent inflammation. However, tincture must be diluted. Add 1 – 2 tablespoons of calendula tincture to 1/4 l of distilled or boiled water. Soak a gauze pad in it and fix it with a dressing on the wound in question. Large, open wounds should be shown to a doctor.
Furthermore, calendula tincture may be used as a mouthwash in case of gum inflammation or other inflammation in the mouth. Add 1 tablespoon of calendula tincture to a glass of warm water and rinse your mouth with it.
#4 Calendula tea

This is the easiest way to preserve calendula flowers. You just pluck the petals off and let them dry. This is best carried out in a dry place (who would’ve thought it) without direct sunlight but enough air circulation.
When the petals are dry, store them in a glass jar or tea box.
To make calendula tea, put 1 – 2 teaspoons of dried calendula petals into a cup and pour hot water over them. Let it sit for 10 minutes before use.
Application
Calendula is often added to tea blends against stomach and bowel disorders or menstruation problems.
I often add a teaspoon of dried calendula to our morning tea blend. Apart from soothing the belly it always – at least in my opinion – adds a ray of sunlight to the day.
Calendula tea can also be used for washing out wounds or as a wound compress. Soak a gauze pad with calendula tea, put it onto a wound or irritation and fix it with a dressing. It can also be used as a wound pad for eyes, bruises, varicose veins or haemorrhoids. Breastfeeding mothers can use calendula compresses to soothe their irritated breasts. And, last but not least, you can rinse your mouth with calendula tea whenever you have an inflammation in the mouth or throat area.
#5 Calendula soap
This is a bit more complex to make and you should know about the basic processes of soapmaking. If you do make the effort, however, you’ll create a very mild soap that’s even suitable for baby’s skin care.
For this easy beginner’s soap, you’ll need
700 g calendula oil (see above)
200 g coconut oil
100 g sunflower oil
133 g sodium hydroxide
330 g calendula tea
1 tbsp dried calendula petals
For the detailed process of making this soap check out this blog post on calendula soap.
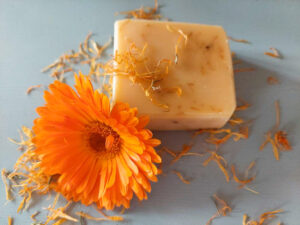
Calendula soap always reminds us of how wonderful summer is – even when it’s dark and cold outside. The special thing here is that we use calendula not only as a soap additive but also as a colouring agent. The calendula tea as the basis for the sodium hydroxide makes a beautiful yellow colouring of the soap. That way, we won’t have to use colouring additives like clays or soap pigments.
Calendula is a wonderful plant for body and soul and I hope I’ve inspired you to try out some of the easy recipes above to preserve it.
by Angela Braun | Apr 29, 2024 | Bodycare
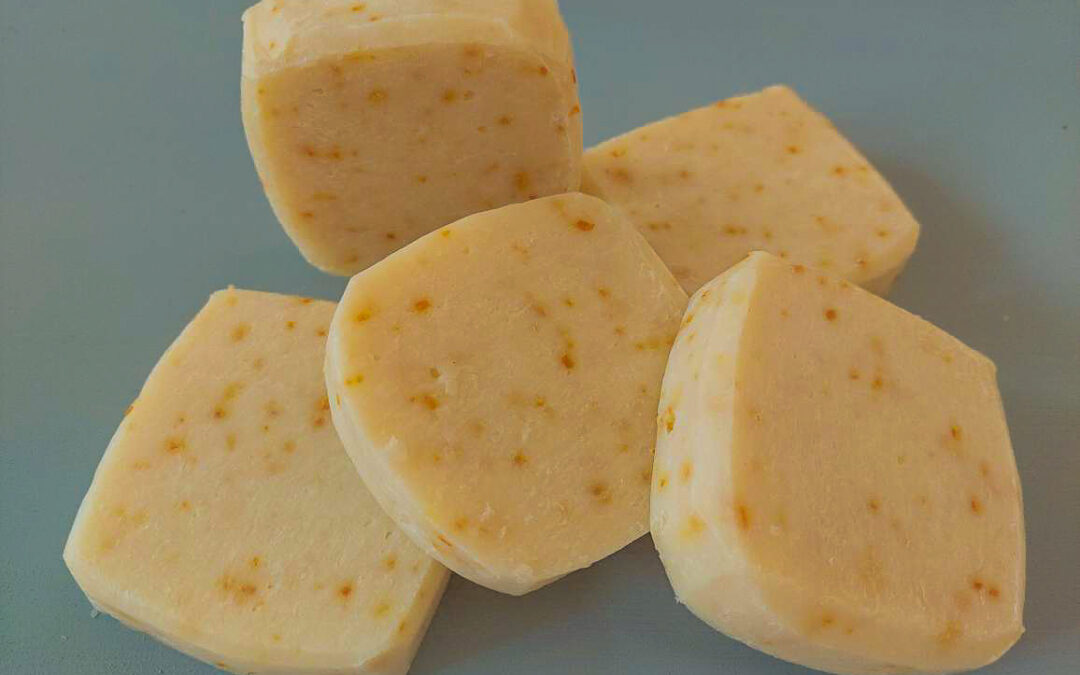
Earlier this year, I got my hands on some organic orange peel… well, ok: a lot of organic orange peel and apart from all the other things I made out of it, I tried my hand at making my first ever hydrolate. It turned out pretty well and I immediately thought about using it in a soap recipe. To enhance the “orange factor”, I added some of the dried and shredded orange peel and essential orange oil and I got a soap that smells and looks as good as it feels. This orange peeling soap appeals to (almost) all senses!
Even better, it’s an easy recipe, suitable for beginners. If you’re not familiar with the process of soapmaking yet, hop over and read this article first. Also, make sure you wear your protective gear throughout the whole soapmaking process. Better safe than sorry.
Orange peeling soap
Superfat: 7 %
Ingredients
350 g olive oil
75 g coconut oil
50 g sunflower seed oil
25 g castor oil
165 g orange hydrolate
64,5 g NaOH
5 g essential oil sweet orange
5 g essential oil bergamot
10 g dried and shredded organic orange peel
Instructions
1. Prepare your soap mould and put on an apron, gloves, breathing mask and safety goggles.
2. Weigh the oils. Slowly melt the coconut oil, then add the olive, sunflower and castor oil. Put a thermometer into the oil mixture and measure the temperature.
3. Weigh the hydrolate in a large enough, heat-proof container.
4. Weigh the essential oils and the shredded orange peel and put them aside for later use.
5. Weigh the sodium hydroxide. Put the water container into a sink and slowly pour the sodium hydroxide into the water (never the reverse!). Stir carefully and slowly with a spoon or rubber spatula until the NaOH crystals have dissolved. Put a thermometer into the lye-water and measure the temperature.
6. When the temperatures of the lye-water and the oils have fallen to 40 – 45 °C, carefully pour the lye into the oils (never the reverse!). Fully immerse a blender and mix both liquids until they are well combined. Make sure that the blender stays in the batter to prevent air bubbles. Mix the batter until a trace forms.
7. Add the dried and shredded orange peel and the essential oils to the soap batter.
8. Pour the soap batter into the mould and either cover it with cling film or spray it with isopropyl alcohol. Cover the mould with towels to keep it warm. Leave the soap in the mould for 48 hours.
9. After 48 hours, carefully remove the soap from the mould and cut it into bars.
10. Let the soap bars cure at a cool and well-ventilated place for 4 – 6 weeks before use.
Characteristics of orange peeling soap
This recipe makes for a great soap with a light peeling effect. It’s got a smooth lather (thanks to the castor oil) and is suitable even for sensitive skin. The orange and bergamot fragrance has a refreshing and awakening effect and the orange peeling particles shine out like little rays of sunlight.
All in all, it’s a perfect soap to use for your morning shower to awaken your body and mind and start the day fresh and energized.
by Angela Braun | Apr 18, 2024 | Bodycare
This mint soap beginner recipe was the first soap recipe I made and it’s still one of my favourites! It’s suitable for beginners which means that it doesn’t require many ingredients.
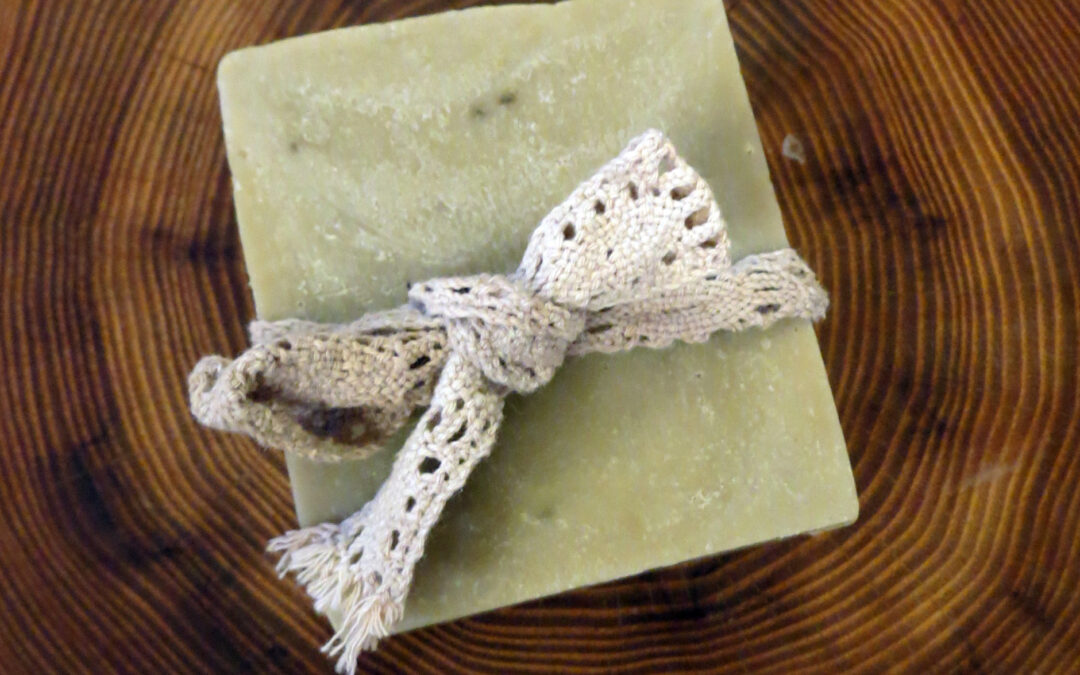
This is a soap specially for sensitive skin due to the green clay. Consistent with this topic, we add hemp oil and mint fragrance. The soap can be used for body and face, even as a shampoo for normal hair or sensitive scalp. In short, it’s the perfect travelling soap!
If this is your first soap, you should become familiar with the soapmaking process, as well as carefully observe the safety guidelines.
Green Mint Soap – Beginner Recipe
Superfat: 7 %
Ingredients
250 g Coconut Oil
150 g Hemp Oil
600 g Olive Oil
137 g sodium hydroxide (NaOH)
320 g Water
30 g Green Clay (powder)
4 g essential mint oil
Instructions
- Prepare your soap mould and put on an apron, gloves, breathing mask and safety goggles.
- Weigh the oils. Slowly melt the coconut oil, then add the hemp and olive oil. Put a thermometer into the oil mixture and measure the temperature.
- Weigh the water in a large enough, heat-proof container.
- Weigh the essential oil and the green clay and put them aside for later use.
- Weigh the sodium hydroxide. Put the water container into a sink and slowly pour the sodium hydroxide into the water (never the reverse!). Stir carefully and slowly with a spoon until the NaOH crystals have dissolved. Put a thermometer into the lye-water and measure the temperature.
- When the temperature of the lye-water and the oils has reached fallen to 40 – 45 °C, carefully pour the lye into the oils (never the reverse!). Fully immerse the blender and start mixing both liquids until they are well combined. Make sure that the blender stays in the batter to prevent air bubbles. Mix the batter until a trace forms.
- Add the green clay and the essential oil to the soap batter.
- Pour the soap batter into the mould and either cover it with cling film or spray it with isopropyl alcohol. Cover the mould with towels to keep it warm. Leave the soap in the mould for 48 hours.
- After 48 hours, carefully remove the soap from the mould and cut it into bars.
- Let the soap bars cure at a cool and well-ventilated place for 4 – 6 weeks before use.
This makes for a great all-purpose soap for your face and body. It smells wonderfully fresh and has a slightly cooling effect due to the mint oil which makes it a fabulous soap for summer.
by Angela Braun | Apr 18, 2024 | Bodycare
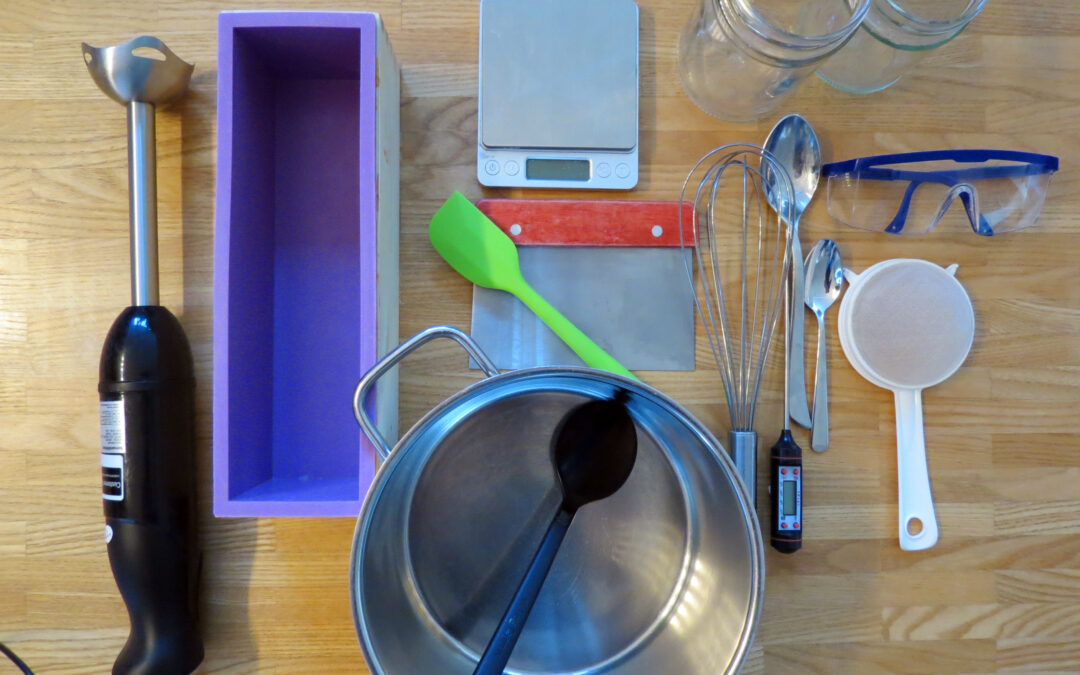
To start with soapmaking, you only need some basic soapmaking equipment. Later, when you are infected with the soapmaking virus, you can always buy additional tools that’ll make the process easier and allow you to make more elaborate designs.
When looking for equipment, take its durability and safety into consideration. Wooden tools are not a good choice, for example, as they are damaged by the lye. The same applies for all things aluminium. Never use anything made from aluminium when making soap as it reacts with lye! It’ll not only ruin your soap but will also form hydrogen, a toxic and explosive gas.
Checklist for your soapmaking equipment

Safety equipment
- Chemical-resistant gloves, like medical disposable gloves or rubber dishwashing gloves.
- Safety goggles that cover the whole eye (and glasses if you wear them); alternatively, you can wear a face shield.
- Breathing mask to avoid breathing in any lye dust or toxic gasses that form when the lye is added to the water.
To become familiar with the safety guidelines for soapmaking, hop over here and carefully read this article.
Bowls and tools
Scale
All ingredients in soapmaking are measured by weight, not by volume as weight is more precise and precision is essential in soapmaking. Digital scales work best, but manual models are also ok. Choose a scale that can hold enough amounts for soapmaking.
Cups and spoons
Cups are great for colouring small portions of soap batter and as a design tool, especially when they have spouts.
Measuring spoons are useful for precision when it comes to dry additives like colourants, clays or exfoliants.
Also, you need one long-handled spoon for creating designs.
Lye-water container
Use a heat-resistant bowl with a handle and preferably a spout. Choose a large enough container as it is important to have plenty of headspace when mixing lye-water.
Bowls
Use heat- and chemical-resistant plastic, glass or stainless steel bowls for mixing the soap batter. Two or three bowls that are large enough for different soap batches (including extra room) are ideal. Additionally, containers with a handle and a spout make it a good deal easier to pour the batter into the mould or create certain techniques.
Thermometer
You need two thermometers (100 °C) to measure the temperatures of oils and lye-water. Lab thermometers are as suitable as candy or digital thermometers.
Whisks, spatula and blender
Whisks in different sizes are great for mixing fragrance oils and other additives into the soap batter. They are also useful for maintaining the appropriate trace as you work. Stainless steel is ideal.
Spatulas are used to scrape the last batter of soap out of the bowl and create certain designs. They should be made from silicone or heavy-duty rubber.
A stick blender is a useful tool that’s almost essential for modern soapmaking. It reduces the tracing process from a 30- to 90-minute process to just a few minutes- When buying a stick blender, look for a model that will not whip much air into the soap batter and has a stainless steel shaft. If you can detach the shaft from the electrical unit, it’s easier to clean.
Other useful equipment
These items aren’t critical for soapmaking but they make the process easier and more convenient.
- Rubbing (isopropyl) alcohol to spray on the surface of the soap to prevent the formation of soda ash.
- Plastic squirt bottles are used for certain designs, like swirling or multi-layers.
- Mini mixer (mini milk frother) for mixing colourants and clays with oil.
- Pipette for precisely measuring fragrance and essential oils
Soapmaking Equipment: Moulds
There are so many options when it comes to moulds for soapmaking: you can make your own out of milk containers, boxes lined with freezer paper and beverage cartons. You can use common kitchen containers (Tupperware) or mini cake moulds (like muffin moulds in different shapes and sizes). Or you can buy moulds made of wood, silicone or plastic that are made specially for soapmaking.
DIY moulds
When you are new to soapmaking, you needn’t buy a soap mould but you can always “misuse” items you already have. Just keep in mind that once used for soapmaking, these items mustn’t be used for food ever again. The second thing is to make sure that the soap batter doesn’t come into contact with aluminium.
Glass and metal are not optimal as it will be nearly impossible to remove the soap from the mould
The following things can be used as soap moulds:
- Waxed cardboard milk and juice cartons
- Empty potato chip tubes
- PVC tubes, washed out and dried; fix one end either with a plastic lid or multiple layers of duct tape
- Cake moulds: best are those made of silicone. If you have cake moulds made of metal, layer them with cling film so that the soap batter doesn’t come into contact with the metal
- Plastic containers like yoghurt cups, Tupperware etc. You may want to grease them before filling in the soap batter
- Wooden moulds; you always have to line wooden moulds with freezer paper
I’m sure there are many more options. Be creative!
Standard moulds
There are great soap moulds in many different sizes, shapes and materials on the market. The most common materials for moulds are silicone, plastic and wood.
Depending on the techniques you want to carry out in your soapmaking process, you can either use log moulds, slab moulds or silicone moulds.
Needless to say, you can also buy special moulds with which you can make very special forms. Often, they’re made of heavy-duty plastic and the removal of the soap can be challenging. It’s therefore best to use a recipe for a comparatively hard soap for this kind of mould.
Conclusion
You see, despite needing some basic equipment, there’s no need to go overboard when starting with soapmaking. Most things you’ll already have and nothing prevents you from using for example a stick blender you already have – as long as from now on you’ll use it for soapmaking only! You should invest in good safety goggles that protect your eyes from lye splashes but other than that, soapmaking equipment needn’t be expensive. After all, you can always add fancy equipment and moulds to your birthday wishlist.
Have fun getting started with soapmaking!

by Angela Braun | Apr 18, 2024 | Bodycare
Soapmaking is a wonderful and rewarding occupation! We can be creative and invent our own recipes, add fragrances and colours to our liking and try out different techniques. However, it bears a certain risk and therefore it’s absolutely necessary to be familiar with the following soapmaking safety guidelines.
Soapmaking Safety Guidelines: Safety equipment
Long sleeves
When making soap we are working with lye. LYE IS CAUSTIC! It’ll burn skin, stain clothing, and damage many surfaces. It can cause blindness and may be fatal if swallowed.
When working with lye, we must always wear long-sleeved shirts. A splash of lye-water will eventually eat through clothing and into your skin but if that happens and you remove the contaminated clothing immediately, the damage to your skin may be minimized.
If you do spill lye-water on your skin, wash it under cold water for at least 15 minutes. Some people always keep some vinegar at hand and recommend washing the lye burn with that. Adding vinegar (which is an acid) to lye (which is a base), however, causes a chemical reaction that releases more heat, so just use water to wash a lye burn.
You can use vinegar, however, to clean up the surfaces of your kitchen from any lye dust that may have gotten onto it.
Safety goggles
As I said before, lye in your eyes may cause blindness, so always wear safety goggles that completely cover your eyes. Glasses are no adequate protection – goggles are a necessity!
Gloves
To cover the skin on your hands when working with lye, always wear chemical-resistant gloves. The best type are disposable medical gloves (of latex or nitrile) but you can also use rubber dishwashing gloves. Make sure their fit is tight enough so that you don’t accidentally get caught.
Apron
You can wear a cloth apron (I always do) to form an additional cover between the lye, your clothing and eventually your skin. It protects your clothes from lye or soap splashes.
Breathing mask
When working with lye, we must avoid breathing in lye dust and the toxic vapours that form when we add the lye crystals to the liquid. In addition to making sure that the room is well-ventilated, we must use a mask to guarantee our safety.
Soapmaking Safety Guidelines: Safety precautions
- When we have all our tools and materials at hand, we should cover the work surface, either with a plastic film (of a dustbin bag that’s been cut open or a plastic tablecloth), cardboard or several layers of newspaper. Many work surfaces react to splashes of lye or soap batter and leave unremovable stains. Whenever possible, you should mix the lye-water over a sink to prevent accidents and contain spills.
- You should plan about 2 – 3 hours for soapmaking, depending on the techniques you want to use. Never soap with pets or small children in the room and make sure that they are adequately supervised so that you can focus on your soapmaking process.
- Never let your soapmaking ingredients come into contact with aluminium! This includes containers, mixing tools and moulds. Aluminium will not only ruin your soap but worse, produce highly flammable hydrogen gas as a by-product.
- Soap utensils are for soapmaking only! Do not use utensils that you use for cooking.
- Mix your lye solution in a heat-safe container that’s a bit larger than the amount of liquid it is holding. When lye is mixed with water, it produces an exothermic reaction, which means that its temperature rises up to 100 °C. Other liquids that contain sugar (e.g. milk) can cause an even warmer reaction.
- Always add the lye to the water, never the other way around! Adding water to lye can cause a “volcano” that could bubble out of the container.
Soapmaking Safety Guidelines: Emergency response
Skin
If you splash lye, lye-water or fresh soap batter on your skin, rinse the area immediately with cold water for at least 15 minutes. Use fully cured soap to wash off the chemical residue. If your skin is red and/or painful, go to the emergency room.
Eyes
Immediately wash out your eye(s) with cold, running water for at least 20 minutes and seek immediate medical attention.
Throat
If you swallow lye in any form, rinse your mouth thoroughly and then drink about two large glasses of water. Do not induce vomiting! Seek immediate medical attention.
All that may sound frightening but as long as you observe all these safety precautions, soapmaking is hardly dangerous.
And don’t worry: after curing, your homemade soap does not contain any caustic lye. That’s only necessary to initiate the chemical process.