by Angela Braun | Oct 28, 2024 | Preserving
Let’s be honest: there comes a point every autumn when we hit “peak pumpkin spice”. You know, when even your neighbour’s cat seems to wear a pumpkin spice collar. But wait: before you swear off anything pumpkin for the rest of your life, let me introduce you to this recipe for sweet-sour pumpkin.
In this form, pumpkin proves it is more than just soup or pie. This German-inspired dish (we call it “Kürbis süß-sauer” – try to say that three times fast!) balances the pumpkin’s natural sweetness with a tangy vinegar-based sauce.
I grew up with this heavenly dish. My mom still makes it usually around mid-November and the smell of the sweet vinegar and spices in combination with misty days, tell me that we’re nearing Christmas time.
The best thing about this dish is that it’s so versatile: What I love most about this dish is its chameleon-like quality – serve it warm alongside your Thanksgiving turkey, at room temperature on a holiday appetizer board, or chilled as a unique addition to winter salads. The sweet-sour preparation also means it keeps beautifully in the fridge, making it perfect for busy weeknight meals or advance holiday preparations.
Serve it warm, and it’s comfort food. Serve it cold, and it suddenly becomes fancy antipasto. Leave it in the fridge, and it gets even better. Whether you grew your own pumpkins this year or picked some up from the local farmers’ market, this recipe offers a delicious way to preserve the yellow berries well into winter.
So if you’re ready to rescue a pumpkin from its pie-destined fate and transform it into something that’ll make your taste buds do a happy dance, stick around. This recipe is about to become your new fall flex – because nobody needs to know it’s actually super easy to make. (That’ll be our little secret!)
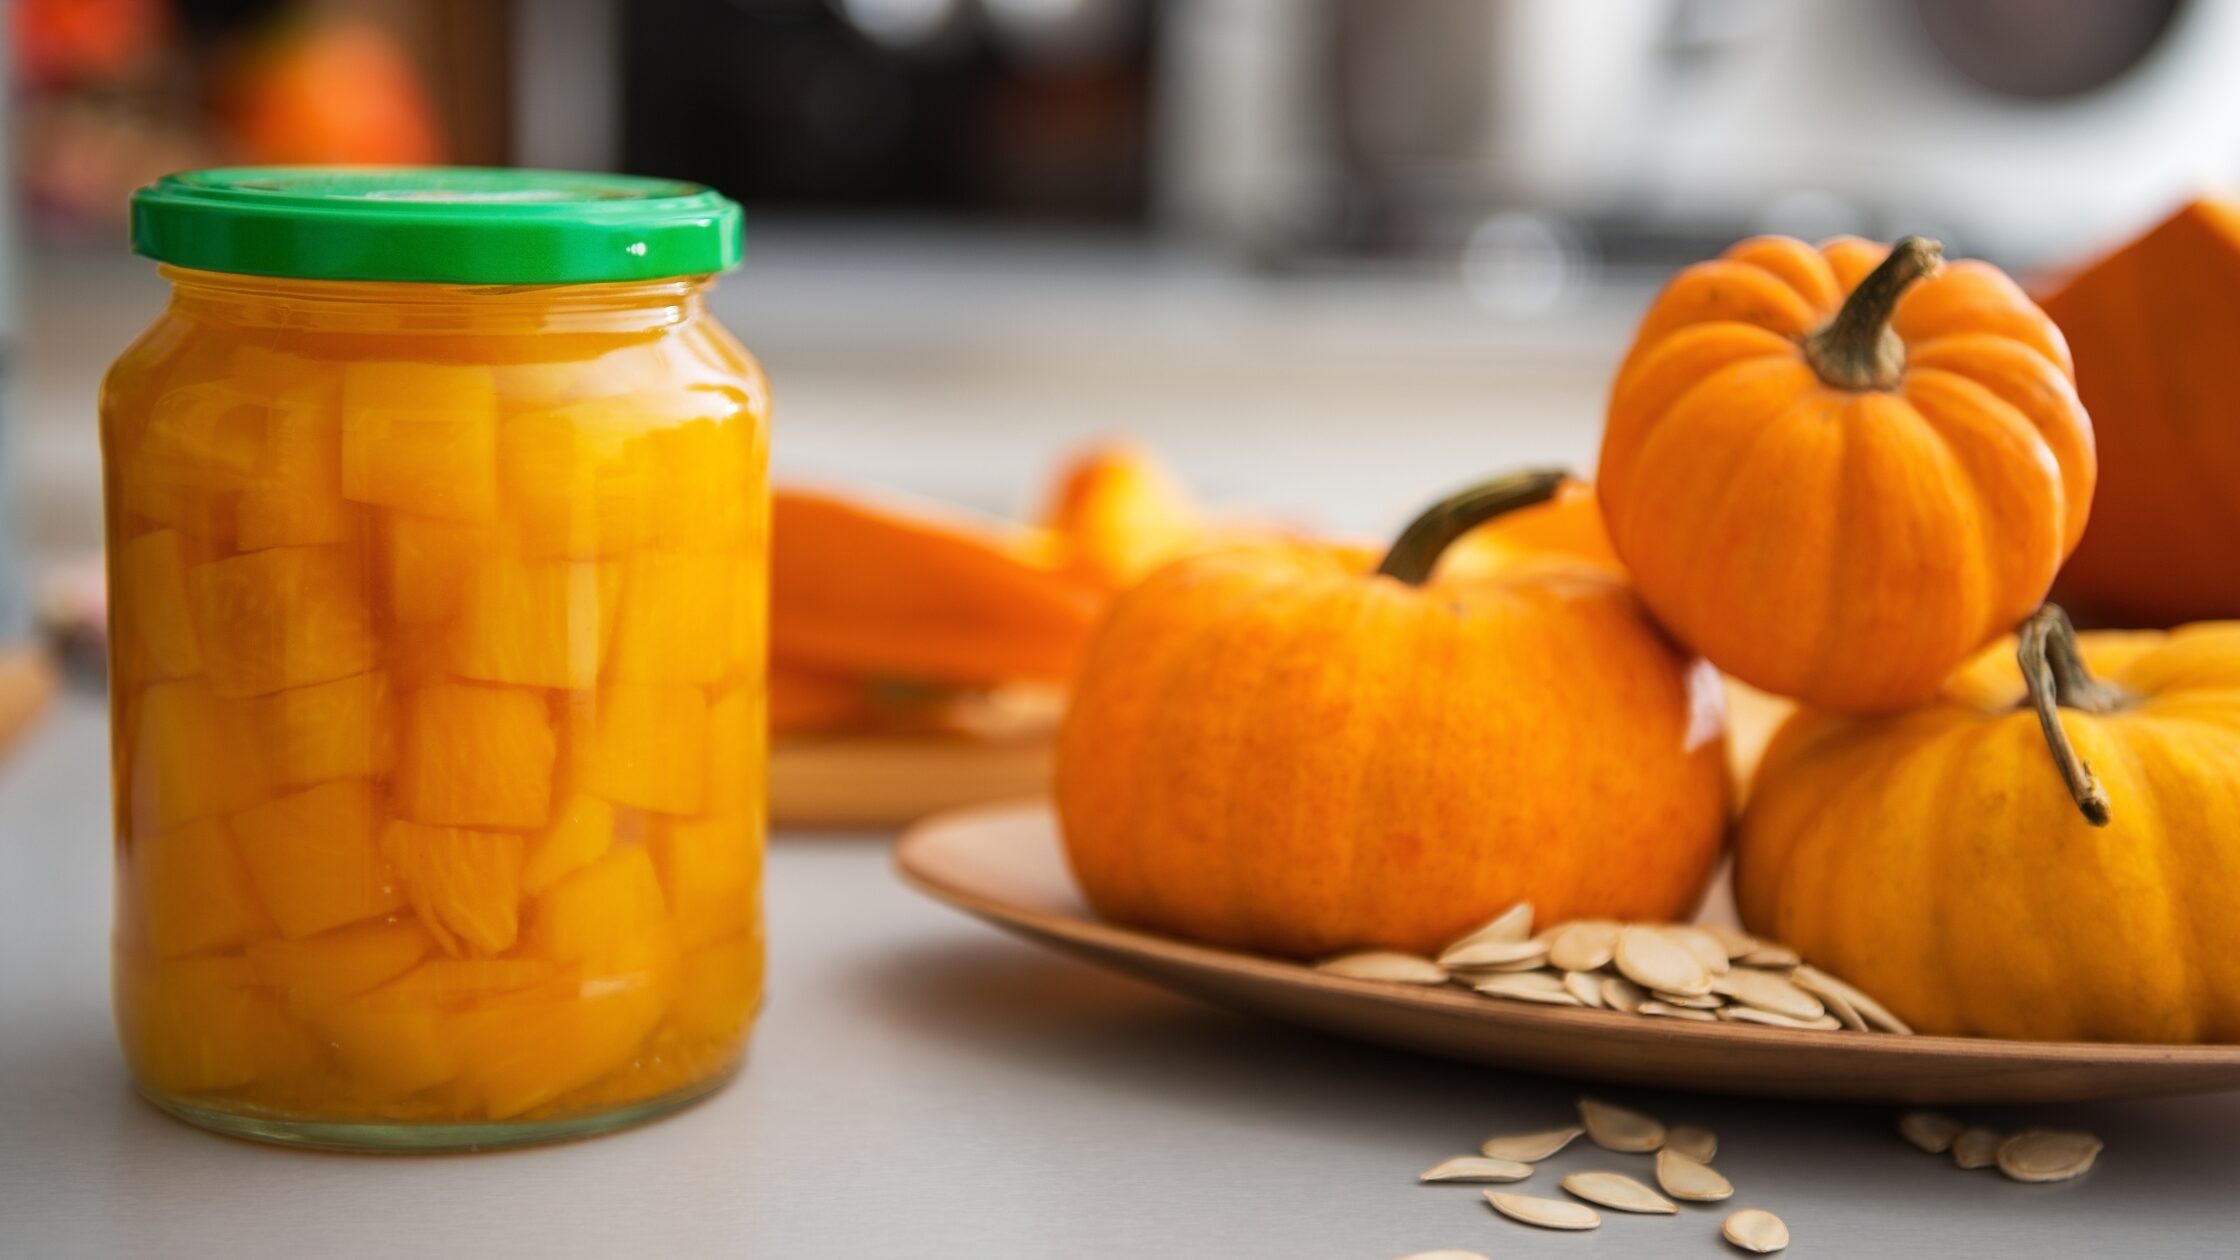
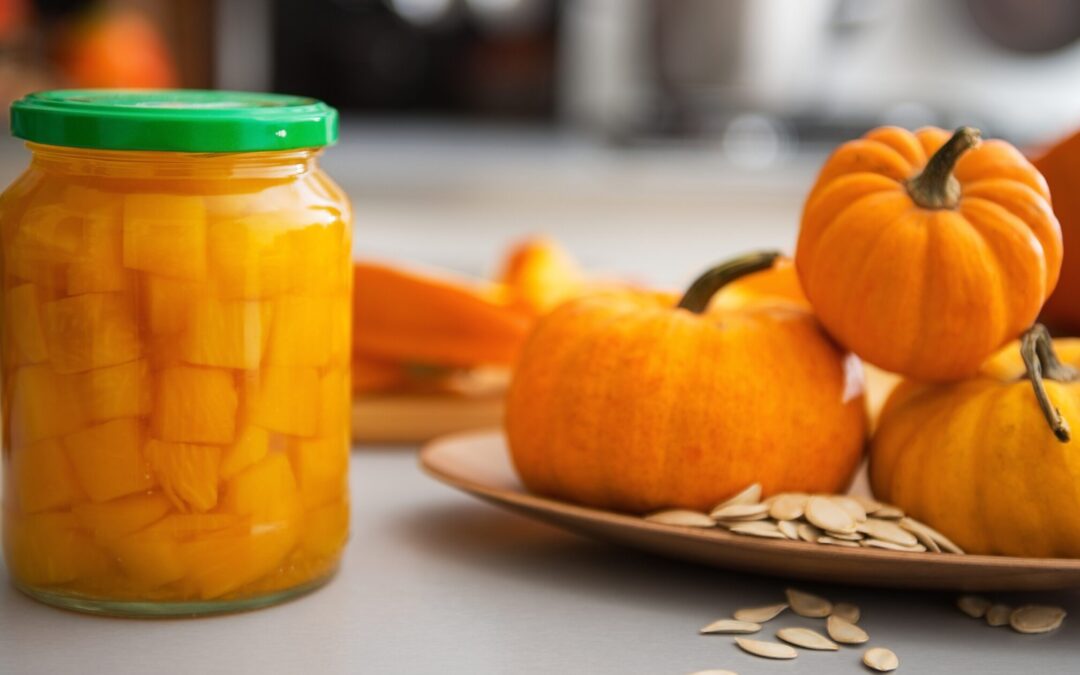
Recipe: Sweet-sour pumpkin
Yield: 5 jars à ¾ l
Ingredients
2 kg pumpkin, net weight
1 l apple vinegar
1 kg sugar
peel of one lemon
3 cinnamon sticks
1 tbsp cloves
Instructions
1. Chop the firm flesh of ripe but not overripe pumpkins into cubes of about 1,5 cm (3/4 inch).

2. Put vinegar, sugar, lemon peel and spices into a pot and bring it to a boil.
3. Cook the pumpkin cubes in several portions until they are glassy through and through. This takes some time, about 20 – 30 minutes, depending on the size of the cubes. Make sure they are really cooked through, otherwise the preserve won’t last.
4. When the pumpkins are well cooked, put them out with a slotted spoon and put them into the jars.
5. Let the liquid boil for 5 minutes. Remove the lemon peel and pour the boiling-hot juice into the jars so that the pumpkin cubes are under the brim. Immediately tight-seal the lids.
6. Stored in a cool and dark place, sweet-sour pumpkin will last at least for one year.
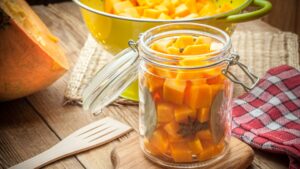
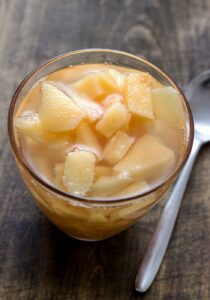
Sweet-sour pumpkins
The best thing about sweet-sour pumpkin is that it’s so versatile: What I love most about this dish is its chameleon-like quality – serve it warm alongside your Thanksgiving turkey, at room temperature on a holiday appetizer board, or chilled as a unique addition to winter salads. The sweet-sour preparation also means it keeps beautifully in the fridge, making it perfect for busy weeknight meals or advance holiday preparations.
Prep Time 30 minutes mins
Cook Time 35 minutes mins
Total Time 1 hour hr 5 minutes mins
Course Side Dish
Cuisine German
- 2 kg pumpkin net weight
- 1 litre apple vinegar
- 1 kg sugar
- peel of one lemon
- 1 stick of cinammon
- 1 tbsp whole cloves
Chop the firm flesh of ripe but not overripe pumpkins into cubes of a 1.5 cm (3/4 inch)
Put vinegar, sugar, lemon peel and spices into a pot and bring it to a boil.
Cook the pumpkin cubes in several portions until they are glassy through and through. This takes some time, about 20 – 30 minutes, depending on the size of the cubes. Make sure they are really cooked through, otherwise the preserve won’t last.
When the pumpkins are well cooked, put them out with a slotted spoon and put them into the jars.
Let the liquid boil for 5 minutes. Remove the lemon peel and pour the boiling-hot juice into the jars so that the pumpkin cubes are under the brim. Immediately tight-seal the lids.
Stored in a cool and dark place, sweet-sour pumpkin will last at least for one year.
Now, if that’s not proof enough that pumpkins can break free from their spice-laden destiny, I don’t know what is! This recipe has turned more pumpkin sceptics into believers than a fairy godmother turning pumpkins into carriages (although, unlike Cinderella’s ride, these sweet-sour pumpkins won’t turn back into regular pumpkins at midnight).
So, if you’re looking for a pumpkin recipe other than pie, this one’s your new best friend. Your taste buds will thank you and your dinner guests will be impressed. And if anyone asks where you got this recipe, just wink mysteriously and say it’s an old family secret. Or you know, share the link to this blog – I’m good either way! 😉
by Angela Braun | Oct 27, 2024 | Preserving
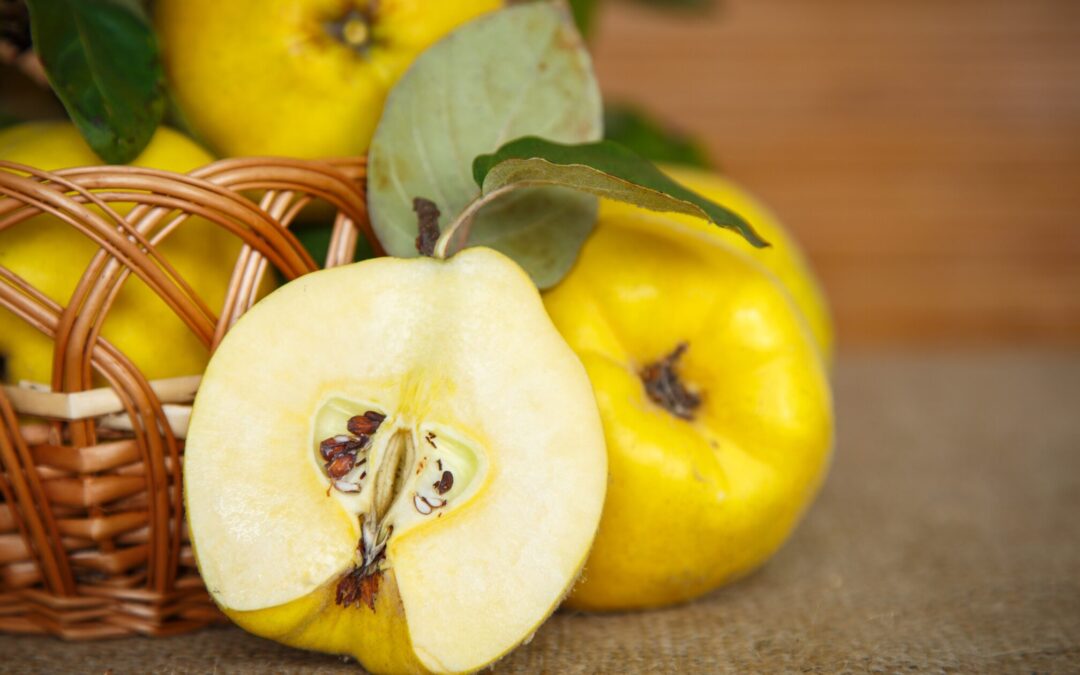
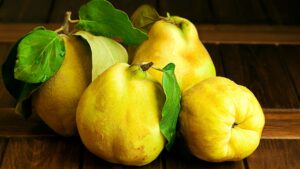
Once the apples, plums, and pears are harvested, once all the nuts are dried and in bags for storage, and the vegetable garden is cleaned up for winter, we are blessed with one last fruit: the quince. Looking like a knobbly apple but smelling deliciously aromatic, quinces transform from hard and astringent into sweet or savoury preserves and dishes. For decades, quinces were regarded as old-fashioned, but their unique flavour has been rediscovered for preserving and seasonal cooking.
Unlike apples and pears, to which they are related, quinces can’t be eaten raw. Through preservation, however, they transform their colour and release their wonderful fragrance, a mixture of apples, pears and roses. Whether you’ve discovered these golden beauties at a local farmers’ market or are lucky enough to have a quince tree in your garden, I show you five foolproof ways to preserve their unique charm.
From classic jellies to Spanish membrillo (a quince paste) that pairs wonderfully with cheese, these recipes will help you capture the essence of autumn’s golden fruit in jars. Even if you are an absolute beginner and have never preserved fruit before, these step-by-step methods will ensure success in the kitchen.
Introduction
A Brief History of Quince
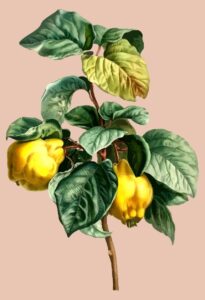
Quince is the sole member of the genus Cydonia of the Rosaceae family (source: Wikipedia). As I said before, quinces are related to apples and pears that are Rosaceaes, as well. Originally, quince is native to the region of the Caspian Sea, but it thrives in a variety of climates, even cold ones.
In ancient Greece, quinces were attributed to Aphrodite and often called “golden apples” which shows how cherished they were even then. But also in Europe quinces were highly esteemed and for some time even a status symbol for wealth.
Typically, quinces are available from late September through December. While apples and pears store very well and thus can be consumed almost year-round, fresh quinces cannot be stored very long. If we want to extend their enjoyment throughout the entire year, we have to preserve them.
Unique Transformation Process
Raw quinces are hard, astringent and inedible. By cooking and preserving, however, they undergo a remarkable change:
Their colour transforms from a pale yellow to a beautiful rose-pink to red.
Their hard flesh becomes tender and succulent.
Harsh tannins which are responsible for the astringent effect, develop into a honeylike sweetness.
Their fragrance and flavour intensify.
Culinary Versatility
So, why would we make the effort to preserve quinces? The answer is easy: preserved quinces are more versatile than fresh ones. Quince jelly, for example, brightens your morning toast and pairs very well with roasted meats. Membrillo, a Spanish quince paste, is essential for cheese boards. Preserved quince in syrup can be added to desserts all year round. And have you ever tasted how dried quince can enhance a winter stew!
Apart from adding to your stockpile, home-preserved quince products can also make unique and appreciated gifts for loved ones. Specialty quince preserves may be expensive to buy ready-made but are affordable to make at home.
Last but not least, quinces are beneficiary to our health: they are rich in vitamin C, dietary fibers as well as antioxidants. Furthermore, they have natural compounds that aid digestion. Best of all: these beneficial properties are retained by our preserving methods.
Before You Begin
Selecting and Preparing Quince
To get the best preserves you must make sure that you have the best fruit. Quinces are usually ripe between the end of September and the end of October. Only choose firm, ripe quinces without any blemishes. Look for a yellow-gold colour, green quinces are not ripe yet.
If you can’t process the quinces right after harvest, you may store them at a cool and dark place at room temperature 13 – 15 °C (55 – 60 °F) for 1 – 2 weeks.
You can also store them in the fridge: wrap them individually in newspaper and put them in the crisper drawer. That way, they’ll last for 2 months.
If you have a very cold basement or a root cellar you can store quinces in shallow boxes layered with newspaper. At a temperature of 0 – 4 °C (32 – 40 °F) and a humidity of 85 %, they’ll last 3 – 4 months.
Never store quinces in plastic bags as they will retain too much moisture and mould!
Basic preparation steps
There are some basic steps for preparing quinces. First of all, remove the downy fuzz by rubbing it off with a wet cloth. This is an important step as the fuzz causes a bitter taste.
Afterwards, wash the quinces and dry them thoroughly.
Depending on what you want to make, you’ll have to peel the fruits. This is best done with a potato peeler. Then quarter the quinces and remove the core. This may be a bit tricky as the quinces are relatively hard. Be careful with your fingers.
How to preserve quince: preserving methods
There are different methods of preserving quinces, from cooking to juicing and even drying. Let’s break down every method:
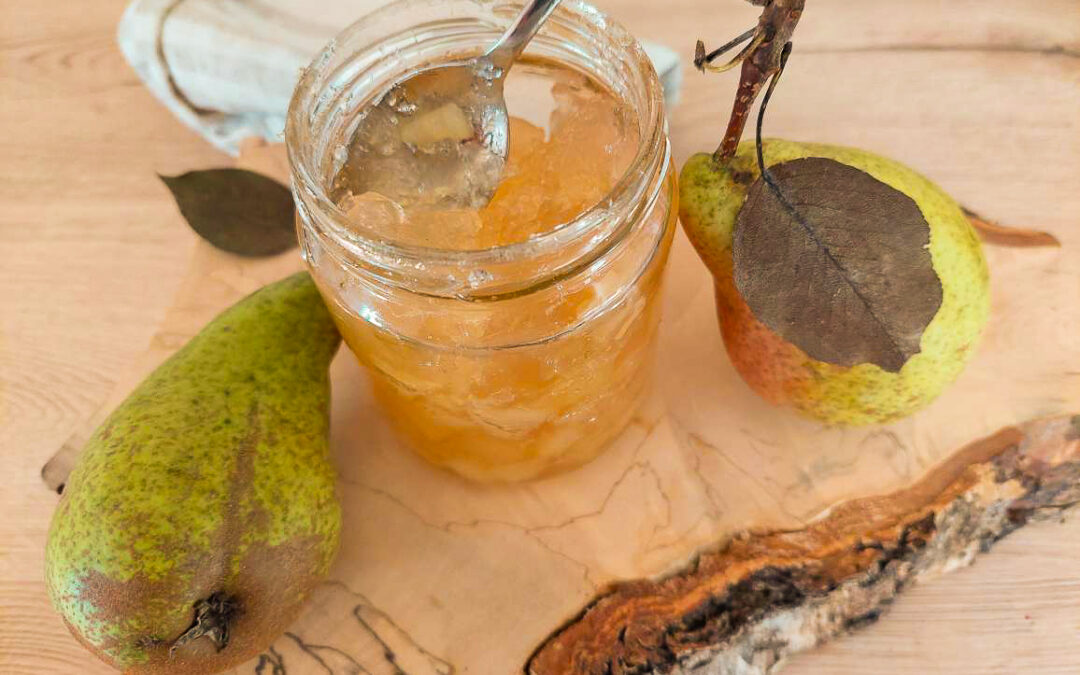
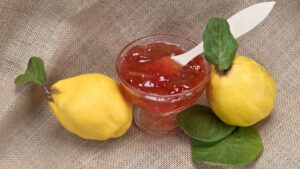
Classic Quince Jelly
Ingredients
Quinces (as much as you can stack in your pot)
Water
Instructions
Juicing
To make quince jelly, we have to make juice first. For that purpose, rub off the downy fuzz, then wash the quinces and cut them into quarters. For making juice it’s not necessary to peel the quinces or remove the core. On the contrary: as the peels contain a large amount of pectin, it’s advantageous to leave them on.
There are two methods for making juice from quinces (or apples or pears for that matter): with a steam juicer or with a normal pot.
If you use a steam juicer, fill the bottom pot with water to the mark. Put on the juicer pot and insert the fruit basket in which you put all the quince quarters. Close the lid and heat the water up. The hot water vapour will gently cook the fruits and release their juice which gathers in the juice pot. From there it can be extracted via the attached tube and filled into sterilized glass bottles or jars.
However, a steam juicer is not the only tool you can use to make juice from quinces. A simple (large) pot with a lid is also ok. In that case, chop the quinces into quarters, put them into the pot and fill up with water until all the fruits are under the brim. Bring the water to the boil and let it simmer for 45 – 60 minutes. Afterwards, strain the juice through a colander that you layered with a cheesecloth. To squeeze out every last drop of the juice, gently press the quinces out. Fill the hot juice into sterilized bottles or jars.
Cooking the jelly
To make the jelly, measure one litre of the quince juice. Put it into a pot and add 1 kg of preserving sugar 1:1 or 500 g of preserving sugar 2:1.
Mix it all very well until the sugar has dissolved and bring this syrup to a boil. Let it boil for 4 minutes and test its consistency by dropping a spoonful of liquid onto a plate. Tilt the plate and let the mixture run. Wipe through the jelly trail with your finger. If it sets, it’s ready to be poured into jam jars. If not, let it boil for another minute and repeat the test.
When the jelly’s ready, carefully ladle it into jars of 250 ml. Fasten the lid and put the glasses upside down on a dishcloth. After 15 – 20 minutes put the jars upright again.
Let the jelly cool down completely, label the jars and store them at a cool, dark place for up to one year.
Membrillo
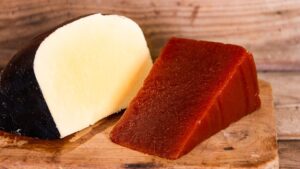
Shortly put, membrillo is a quince paste. However, this recipe is not known to Spain alone. In France it’s known as cotiqnac, in Germany we call it Quittenkäse (“quince cheese”). The basic principle is always the same: cook quince with sugar, blend it, then let it set and – optionally – dry it. Easy, isn’t it? Let’s break the process down.
Ingredients
1 kg quinces
1 kg sugar
Water
Juice of 1 lemon
Instructions
Rub the fuzz off the quinces and wash them thoroughly.
Quarter the quinces, peel them and remove the cores and any hard or “grainy” parts. You can use undamaged peels and the cores to make quince vinegar. If you want to know more about that, hop over to this article on apple vinegar. The process is the same and you’ll get a marvellous homemade vinegar from scraps!
Weigh the cut quinces before cooking and put them in a pot. Add 1 litre of water and bring it all to a boil. Let it simmer until the quinces are tenderly cooked. This will take 30 – 45 minutes.
Puree the fruit with a kitchen blender until you get a smooth mass. Add the sugar to the quince puree and let it all cook while constantly stirring. The colour will progressively change from yellow to a brownish red. Keep stirring well to prevent burning the paste.
When the dough releases from the sides of the pot, you can ladle it into a square or rectangular form, lined with baking paper.
Let it cool down completely. When it’s firmly set, you can drop it out of the form.
If you want to store it, leave it in that shape and cover it with powdered sugar. Afterwards, wrap it in greaseproof paper and store it in the fridge where it will last for at least 3 months. Alternatively, you can freeze membrillo for up to one year.
Serving suggestion
To serve the membrillo, cut slices of about 1 cm and chop them into small squares. It pairs wonderfully with hard or semi-hard cheese like Manchego or brie. Alternatively, membrillo can also be used as an ingredient in various dishes, such as a filling for tarts and pastries, or as a glaze for meats.
Quince in Syrup
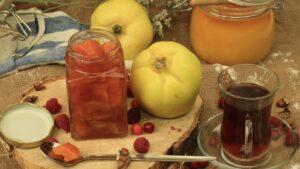
Similar to pears, quinces can be canned in syrup. They pair marvellously with rice pudding or can be used as a filling for cakes and pies. And if you haven’t tried quince crumble yet, I sincerely recommend baking one with these quinces in syrup as a base!
Ingredients:
1 kg firm, ripe quinces
750 g sugar
½ vanilla bean
1 cinnamon stick
Juice of one lemon or
Apple vinegar
1 litre water
Instructions
Sterilize jars and lids by rinsing them with boiling water. Let them dry thoroughly.
Rub the fuzz off the quinces and wash them thoroughly.
Put some water into a bowl and add the lemon juice or apple vinegar
Quarter the quinces, peel them and remove the cores and any hard or “grainy” parts. Either leave the quinces quarters or chop them into cubes of about 2 – 4 cm (1 inch). Put the quinces into the acidified water so that they won’t turn brown.
When all the quinces are done, prepare the syrup:
Put the water and sugar into a pot and stir until the sugar has partly dissolved. Slice the vanilla bean lengthwise and scrape the vanilla out with a knife. Add the vanilla seeds, the sliced pod and the cinnamon stick to the sugar water.
Bring all to a boil and stir until the sugar has dissolved completely. Let the syrup simmer for 5 minutes.
Now drain the quince (cubes) and add them to the simmering syrup. Bring it to a boil once again and let it simmer until the quinces are tender (about 45 – 60 minutes). They should have turned a beautiful rose-pink colour by now.
Pack the quinces into the sterilized jars.
Remove the cinnamon stick and vanilla bean from the syrup and carefully fill the jars up with syrup, leaving 1 cm (½ inch) of headspace. Immediately seal the jars tightly with the lids.
Let the jars cool down completely and check the lids for tightness.
Quinces in syrup can be stored up to one year in a cool and dark place. Once opened, put the jar in the fridge where it may last up to 1 month.
Serving suggestions
Serve quinces in syrup as a dessert together with whipped cream, vanilla ice cream or yoghurt. It’s also great as a topping to cheesecake, rice pudding or on your morning porridge.
Use the syrup to flavour tea, cocktails or sparkling water.
Quince Compote
This quick and easy recipe is one of my favourite! If you just make one dish with quinces, I recommend this recipe for quince compote.
Ingredients
1 kg quince
Sugar to your taste
¼ l water
1 cinnamon stick
½ tsp ground cinnamon
A knife point of ground anis and cardamom each
Juice of one lemon or
Apple vinegar
Instructions
Sterilize jars and lids by rinsing them with boiling water. Let them dry thoroughly.
Rub the fuzz off the quinces and wash them thoroughly.
Put some water into a bowl and add the lemon juice or apple vinegar
Quarter the quinces, peel them and remove the cores and any hard or “grainy” parts. Chop the quarters into cubes of about 2 – 4 cm (1 inch). Put the quince cubes into the acidified water so that they won’t turn brown.
Drain the quinces and put them into a pot. Add the water, sugar and spices and bring all to a boil. Let the quinces simmer until they’re soft (20 – 30 minutes).
You can eat the compote just like that or you put it still hot into the sterilized jars with ½ inch (1 cm) headspace. Secure the lids tightly. To prolong its shelf-life, can the compote for 30 minutes at 80 °C in a water-bath canner.
Thus preserved, quince compote can be stored at a cool and dark place for up to one year.
An alternative preservation method is freezing: fill the cooled compote in portions in plastic bags and put them in the freezer.
If you like, mix the quinces with apples before cooking.
Serving suggestions
Serve quince compote with your morning porridge or granola. It also makes a great topping for waffles and French toast. Or just stir it into yoghurt to make a quick and yummy dessert.
Dried Quince

Who would have thought that you could dry quinces? For a long time, I believed that quinces had to be cooked to become edible but obviously, drying them is also a great method for preserving them. Dried quince are a delicious snack to go but can also be used in stews, cakes or even as tea!
Ingredients
Quinces, as many as you like
water
Juice of one lemon or apple vinegar
Instructions
Rub the fuzz off the quinces and wash them thoroughly.
Put some water into a bowl and add the lemon juice or apple vinegar
Peel the quinces if you like but it’s not essential. Quarter them and remove the cores and any hard or “grainy” parts.
Cut the quinces into slices of about ¼ inch (6mm) and put them into the lemon water to prevent browning.
Drain the quince slices and dab them dry.
You can either dry the quinces in the oven or a dehydrator.
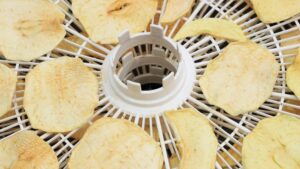
Dehydrator
Clean the dehydrator trays and arrange the quince slices so that they don’t overlap. Start the dehydrator at 60 °C (135 °F) and dry the slices until they’re leathery.
Oven
Line parchment paper on trays or racks and arrange the quince slices so that they don’t overlap.
Set your oven to 60 °C / 140 °F (fan oven) and put the racks or trays with the quinces in. Prop the door slightly open by sticking a wooden spoon into the opening. That way, the condensation water can evaporate.
Dry the quinces between 6 – 12 hours.
Note: it’s impossible to give you an exact drying time as it depends on many factors like air humidity, room temperature, thickness of the slices and the overall moisture content of the fruit.
How to determine whether your quinces are dry enough
First, properly dried quince should be leathery and pliable, not sticky or tacky to the touch. When you cut or squeeze them, there mustn’t be any moisture.
Storage
The most important point is to let the dried quinces cool completely before storing. Once they are cool, put them into airtight containers or vacuum-sealed bags. Stored in a cool and dark place they will last for 6 – 12 months if properly dried.
How to use dried quince
The most common (and fastest) use is to snack dried quinces directly as they are. You can also add them to your morning granola or mix it with nuts for a healthy snack mix.
You can, however, use dried quince also in a more versatile way in sweet and savoury dishes:
– Soak them in hot water, tea or wine, for example, until they are soft again (approx.. 15 – 30 minutes). Then use the soaking liquid in recipes as it contains flavour and nutrients.
– Add dried quinces to food like Middle Eastern stews (especially khoresh), Moroccan tagines or Turkish compotes. It’s also a great component of European meat dishes, pairs well with savoury dishes like rice pilaf or can be part of stuffing mixtures.
– Chop your dried quince and add it to your oatmeal or porridge. It adds a delicious flavour (and some nutrients) to yoghurt and breakfast cereals. Also, dried quince can be very well baked into muffins, scones or bread. Use it in fruit cakes or spiced holiday desserts as well as in ice cream or frozen yoghurt.
– Use dried quince for beverages. For example, steep it in hot water for a fruity tea. You may also add it to mulled wine or cider to add a fruity flavour.
Conclusion
The versatility of quinces makes them a rewarding fruit to preserve, whether you’re drawn to the ruby-red glow of poached quinces, the sweet intensity of membrillo, or the delicate flavour of quince jelly. While these ancient fruits require more time and patience than modern quick-preserving methods, the results are truly worth the effort. The transformation of hard, astringent quinces into tender, aromatic preserves is a wonderful tradition that connects us to generations of home preservers before us.
Whether you’re an experienced preserver or trying quince for the first time, remember that the key to success lies in selecting ripe, fragrant fruit and taking the time to prepare it properly. Your reward will be a pantry stocked with preserved quinces to enjoy throughout the year, adding their unique flavour to cheese boards, desserts, or simply spread on fresh bread.
If you are lucky enough to have a quince tree in your yard or know someone with a quince tree who is eager to share their harvest with you, don’t hesitate to try preserving them! Not only will you be participating in an age-old culinary tradition, but you’ll also be creating something truly special that can’t be found on supermarket shelves.
by Angela Braun | Sep 25, 2024 | Preserving
If you, like me, pickle a lot of vegetables, you need a good deal of apple vinegar. Instead of buying it, however, why not try your hand at making it by yourself – from scraps! It’s so easy, that you’ll wonder why you didn’t do it earlier and never will buy a drop of apple vinegar again. All you need is apple scraps that is peels and cores (for example from making apple sauce or dry-canning apples), water, sugar and a bit of raw apple vinegar to start. As containers you’ll need sufficiently large sterile bottles or jars as well as some cloths to cover the jars
But before we start, let’s take a quick look at how vinegar is made.
Step 1: Sugar becomes alcohol
The first step to making apple vinegar is the production of apple wine. Natural yeasts transform the sugar from the apples plus the sugar we add into alcohol. You can see that by the formation of white foam on the surface. It’s also possible that after a few days, a white layer forms on the surface. That’s kahm yeast and it’s harmless.
When, after some time, the acid content in the liquid rises, kahm (and other) yeast(s) disappear.
Step 2: Alcohol becomes vinegar
As soon as the first alcohol has formed, acetic acid bacteria also start to work. They are naturally in the air and on the fruits and need alcohol and oxygen to multiply. For this reason, it’s essential that you only cover the jars with a cloth because without oxygen the acetic acid bacteria cannot work.
The alcohol is now fermented to acetic acid. If you want to learn more about how fermentation works, this article is just the thing you need:
How to make apple vinegar from scraps
Prepare your jars by washing them and the lids in hot water or the dishwasher and then let them dry.
Before processing your apples, wash them thoroughly in the sink to remove any dirt. Now peel and quarter them (depending on what you want to do with those apples) and remove the core. Cut off any rotten parts. Only unspoiled and healthy peels and cores can be used for making vinegar.
When chopping apples, I usually have three bowls at hand: one for the apple quarters to be processed, one for the “good” apple peels and cores and one for the rotten parts to be thrown away.
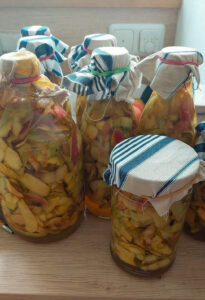
Put the peels and cores into a one-litre glass bottle until it’s about ¾ full. Add half a cup of sugar, and half a cup of apple vinegar as a starter and fill the bottle up with water. Stir or shake the mixture until the sugar has dissolved.
Don’t close the bottle with a lid as we need oxygen to make vinegar. Instead, put a clean piece of cloth on the bottle opening and fix it with a rubber band. That way, the liquid is exposed to oxygen, but no fruit flies or dirt can get into it.
Put the bottle in a warm, dark place (no direct sunlight) and let it sit for about 10 – 14 days. After a few days, you’ll see tiny bubbles forming.
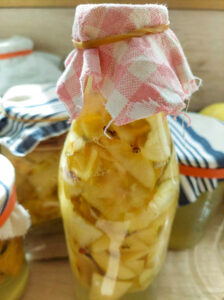
After a few days, bubbles start to form
Sometimes, the mixture builds foam and may even bubble over the rim. If a thin white spread forms on the surface that destroys when you stir it slightly, that’s no reason to worry. It’s kahm yeast and will neither affect the process nor the taste. Around day 6 it’ll start to smell of vinegar.
After about 10 – 14 days, strain the liquid through a colander into a clean glass bottle. Make sure to squeeze out any residual liquid from the peels. If you have, you can add a vinegar mother to your fresh vinegar. This will help it to mature.
Put a fresh clean cloth on the opening and fix it with a rubber band. Let the vinegar mature in a cool, dark place for about six months. During this time, a mother of vinegar might form which is a great sign that everything’s going well! Taste your vinegar after six months. If it’s to your liking and a vinegar mother has formed, decant it into a fresh bottle. Carefully put the vinegar mother into a separate jar and fill it up with enough vinegar to cover it completely. You may use it as a starter for the next vinegar.
Homegrown jellyfish, a.k.a. mother of vinegar
Other fruit vinegars
I’ve also tried making vinegar from pear and quince scraps and it worked out very well. The pear and quince vinegar took a bit longer to mature (about 8 – 12 months) but the wait was absolutely worth it! Both vinegars tasted deliciously fruity and relatively mild and they add an interesting flavour to fruit salads. Pear and quince vinegar are also marvellous in a vinaigrette for autumn salads like lamb’s ear and chicory with pears, grapes and walnuts.

by Angela Braun | Sep 20, 2024 | Preserving
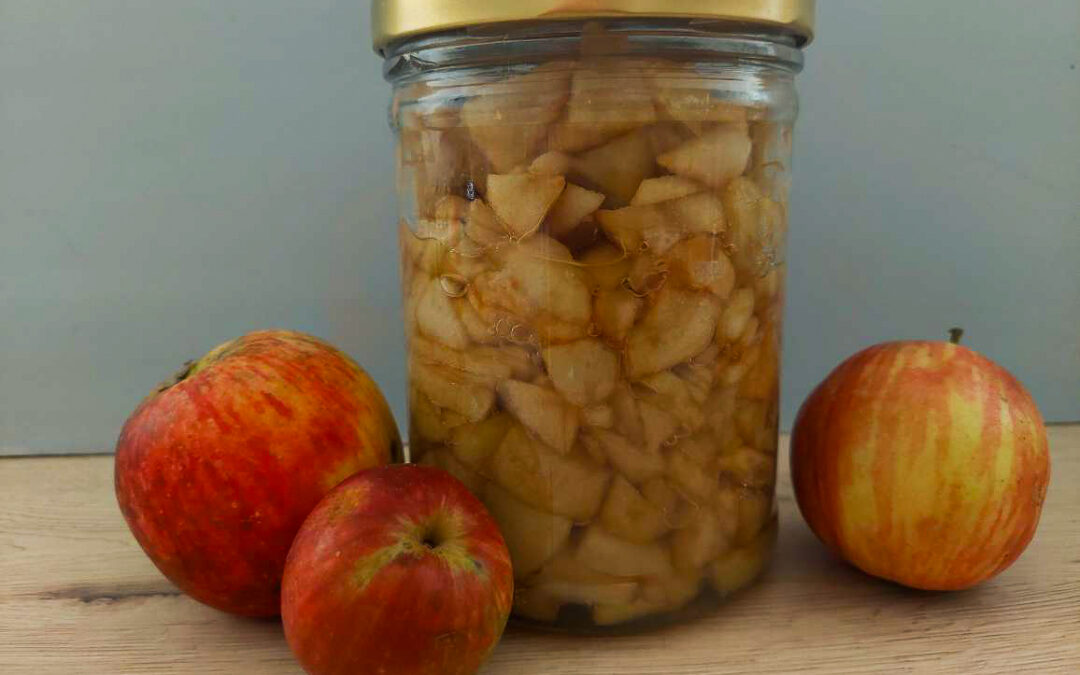
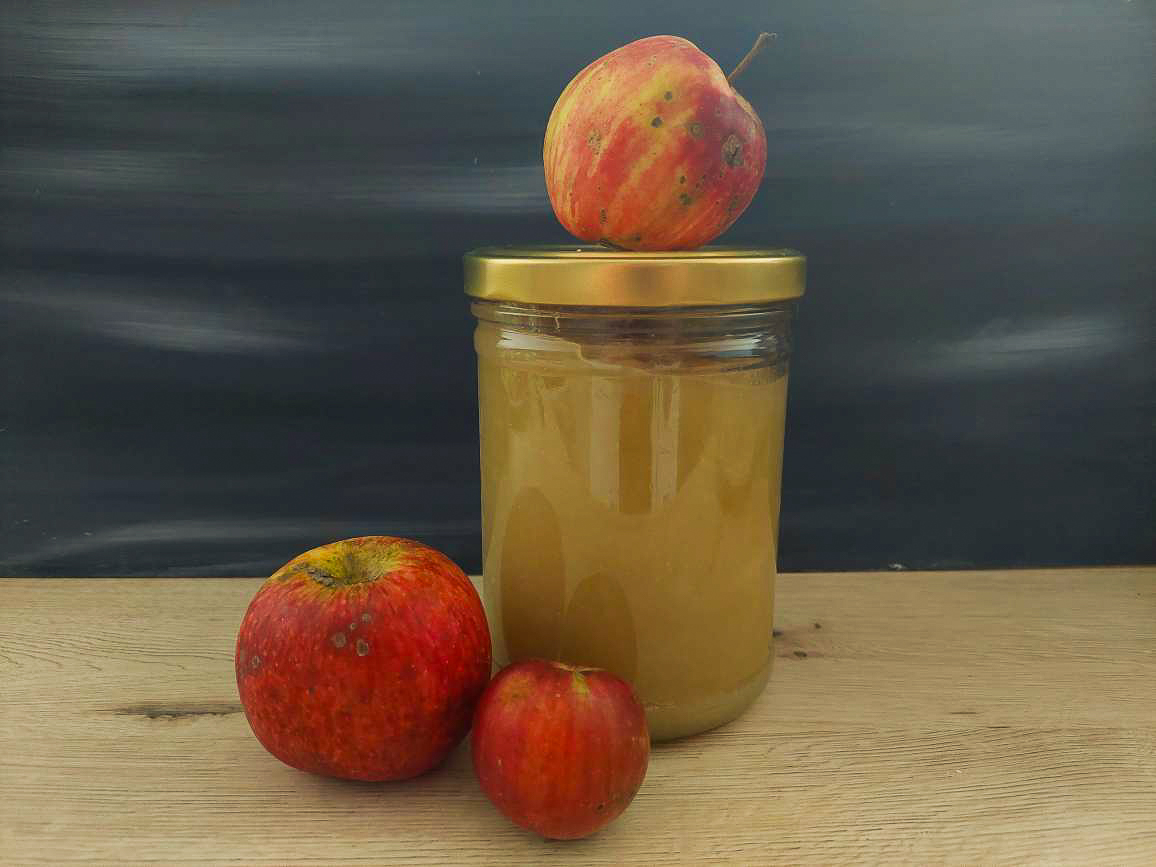
Apples are available all year round, especially when you grow a variety of them that ensure a long harvesting and shelf life. If you don’t have an orchard, you still can buy apples at any time of year. Nevertheless, fresh apples, plucked right from a tree when they are ripe are the privilege of autumn. I’m lucky enough to have a wonderful brother with a vast orchard and enough love for his sister that he allows her (that is: me) to have her share of his fruit harvest. Where we had very few fruits last year, this year has presented us with an abundance of them! Apart from eating the apples right from the tree and baking apple cakes in all varietes, what better way to preserve them for the upcoming winter than by canning apple sauce?
Ingredients and equipment for canning apple sauce
You’ll need a water bath canner (no pressure canner necessary for this recipe), appropriately large jars with well-closing lids and apples – at least one kilogram, the more the better – and sugar if you like.
Preparations
Prepare your jars by washing them and the lids in hot water or the dishwasher. Put the jar lids and rings or the rubber bands in a pot and cover them with water. Bring the water to a boil and let it all cook for five minutes. Remove the lids, rings and/or rubber bands from the boiling water and put them onto a clean dish towel on the kitchen counter. Let them dry.
Instructions for canning apple sauce
Rinse the apples in your sink to wash off any dirt. Also, remove any leaves, grass or other residues. Once washed, peel the apples, quarter them and cut out the cores. Cut off all rotten parts. If you want to make apple vinegar from the scraps, make sure that you only use unspoiled peels and cores. I usually take three bowls when preparing apple sauce: one for the apple quarters to be cooked, one for rotten apple parts or wormy cores to discard and one for all the scraps I later use for making vinegar.
Cooking
Once you’ve peeled and cut all the apples, wash the quarters again and put them into a large pot (or several if you have too many apples to fit into one, though you can also cook them in succession). Fill up water to about a quarter of the pot and put the apples to a boil. When the water’s boiling, carefully stir the apples from the top under so that they cook as well. After some minutes – depending on the sort – the apples become soft. Now use a hand blender to mix them into a smooth, homogenous mass. If you want, you can now optionally add some sugar to the apple sauce, but it isn’t necessary for preserving. I don’t use sugar in my apple sauce but if you want to and like your sauce sweeter, go ahead and add sugar to your taste.
When the sauce is blended stir it well until it’s boiling. Be very careful at this stage as the thick mass will easily bubble over and explosively release splashes of hot apple sauce that usually shoot at an unsuspecting arm or hand. I’ve gotten burnt more than once and know what I’m talking about…
Remove the pot from the stove and with the help of a funnel, ladle the apple sauce into the jars. Leave about one inch of headspace. Before closing the lids, make sure that the rim of the jar is clean. That’s best ensured by dipping a clean cloth (for example a towel) into some vinegar and wiping the rims clean. Seal the jars with the lids.
Canning
To can the jars, fill as much water into your water-bath canner as indicated in the manual and heat it. The water in the pot must have approximately the same temperature as the apple sauce in the jars. If we put the hot jars into cold to medium-warm water, they would break due to the huge temperature difference between the outside (water) and the inside (apple sauce). When the water has reached about 70 °C (160 °F), you can put the jars into the water bath canner (the apple sauce in the jars will have cooled down to approximately the same temperature by now). Make sure there is enough space between the jars and they don’t touch. Close the pot lid and bring the water to a boil. Once it boils, set the timer to 35 minutes and let the canner do its wonders.
When time’s up, carefully open the canner lid. Beware of the hot steam! Remove the jars with a glass lifter out of the canner and put them onto a towel on the counter to cool down.
When they’ve cooled down completely, store the apple sauce in a cool and dark place. It’ll last up to two years.
Apple sauce is a wonderful addition to pancakes or waffles, you can stir it into your morning yoghurt, make an autumnal apple tiramisu with it or just scoop it right from the jar.
Apple Sauce
Apple sauce is a wonderful addition to pancakes or waffles, you can stir it into your morning yoghurt, make an autumnal apple tiramisu with it or just scoop it right from the jar.
Course Preserve
Cuisine German
- apples, at least one kilogram, the more the better
- sugar (optional), to taste
Prepare your jars by washing them and the lids in hot water or the dishwasher. Put the jar lids and rings or the rubber bands in a pot and cover them with water. Bring the water to a boil and let it all cook for five minutes. Remove the lids, rings and/or rubber bands from the boiling water and put them onto a clean dish towel on the kitchen counter. Let them dry.
Rinse the apples in your sink to wash off any dirt. Also, remove any leaves, grass or other residues.
Once washed, peel the apples, quarter them and cut out the cores. Cut off all rotten parts. If you want to make apple vinegar from the scraps, make sure that you only use unspoiled peels and cores.
Once you've peeled and cut all the apples, wash the quarters again and put them into a large pot (or several if you have too many apples to fit into one, although you can also cook them in succession). Fill up water to about a quarter of the pot and put the apples to a boil.
When the water's boiling, carefully stir the apples from the top under so that they cook as well. After 5 - 20 minutes - depending on the variety – the apples become soft. Now use a hand blender to mix them into a smooth, homogenous mass. If you want, you can now optionally add some sugar to the apple sauce, but it isn't necessary for preserving.
When the sauce is blended stir it well until it’s boiling. Be very careful at this stage as the thick mass will easily bubble over and explosively release splashes of hot apple sauce that usually shoot at an unsuspecting arm or hand.
Remove the pot from the stove and with the help of a funnel, ladle the apple sauce into the jars. Leave about one inch of headspace. Before closing the lids, make sure that the rim of the jar is clean. That's best ensured by dipping a clean cloth (for example a towel) into some vinegar and wiping the rims clean. Seal the jars with the lids.
To can the jars, fill as much water into your water-bath canner as indicated in the manual and heat it. The water in the pot must have approximately the same temperature as the apple sauce in the jars. If we put the hot jars into cold to medium-warm water, they would break due to the huge temperature difference between the outside (water) and the inside (apple sauce). Make sure there is enough space between the jars and they don’t touch. Close the pot lid and bring the water to a boil. Once it boils, set the timer to 35 minutes and let the canner do its wonders.
When time's up, carefully open the canner lid. Beware of the hot steam! Remove the jars with a glass lifter out of the canner and put them onto a towel on the counter to cool down.
When they’ve cooled down completely, store the apple sauce in a cool and dark place. It’ll last up to two years.